How to fix total blocking time (TBT) in WordPress?
Total Blocking Time (TBT) has a great impact on the performance of the website. TBT is also one of the important metrics in the algorithm of Google Page Speed Insights and GTmetrix to decide performance scores. Although TBT is not part of the three Core Web Vitals(CWV) it does affect CWVs, page speed scores, and real user experience. So, it is important to fix Total Blocking Time.
So what exactly is TBT and how we can fix it?
That’s what we are going to discuss in this article.
What is TBT?
Total Blocking Time is a metric that represents tasks taking longer than 50ms to finish. The higher the TBT, the longer it will take for the page to become responsive. As Google is continuously improving the experience for its users so every metric of Google Page Speed Insights has a direct link to real user experience. So, if the TBT of your website is higher than the recommended value it does not only mean bad scores but also a bad user experience for real users.
Causes of high TBT
Total Blocking Time (TBT) is caused by external scripts or 3rd party code, unoptimized JavaScript, fonts, and images. The most culprit is 3rd party codes like Google Analytics, FB Pixels, Youtube, etc.
Steps to fix TBT
Following the below steps you will be able to fix Total Blocking Time:
Delay Execution of JavaScript
External JS which is not needed during the initial rendering of the page should be delayed until user interaction. For example, JS associated with floating chat buttons can greatly add to Total Blocking Time. Delaying JS for the Chat button until user interaction will reduce TBT. Similarly, most of the external JS except Analytics, Pixels, and important ones can be delayed. In WordPress, it’s now very easy to delay the firing of JS until user interaction. Below are the two plugins for delaying JS.
Using WP Meteor
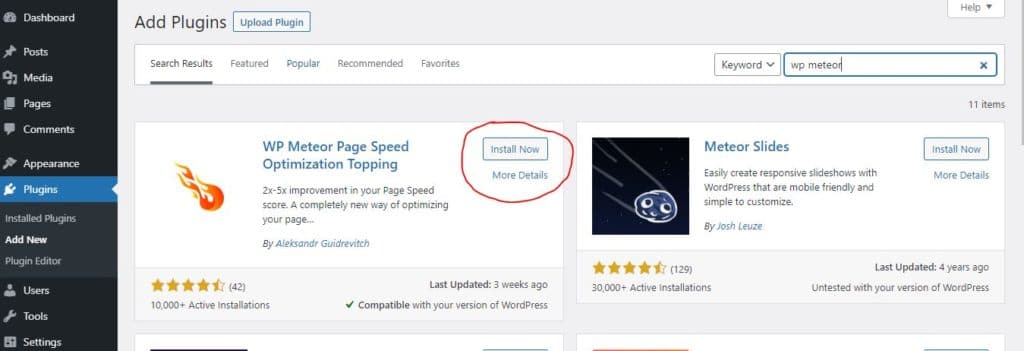
WP Meteor is a free plugin and you can install it directly from the WordPress repository. Go to Plugins and “Add new”. Search for “WP Meteor”, install and activate it.
WP Meteor by default will delay the firing of JS by 1 second. So, it will start working without any configuration once you activate it. However, you can change the delaying time from the settings page of the plugin. You will find the settings of the plugin under settings with the name “WP Meteor”. I would recommend setting the delay time to 2 seconds. User interaction will give the best results but can break design until user interaction. So, unless you know how to exclude specific scripts through the Exclusions tab, you should enable delay until user interaction. I will write a detailed article about exclusions of scripts from delaying in the coming days.
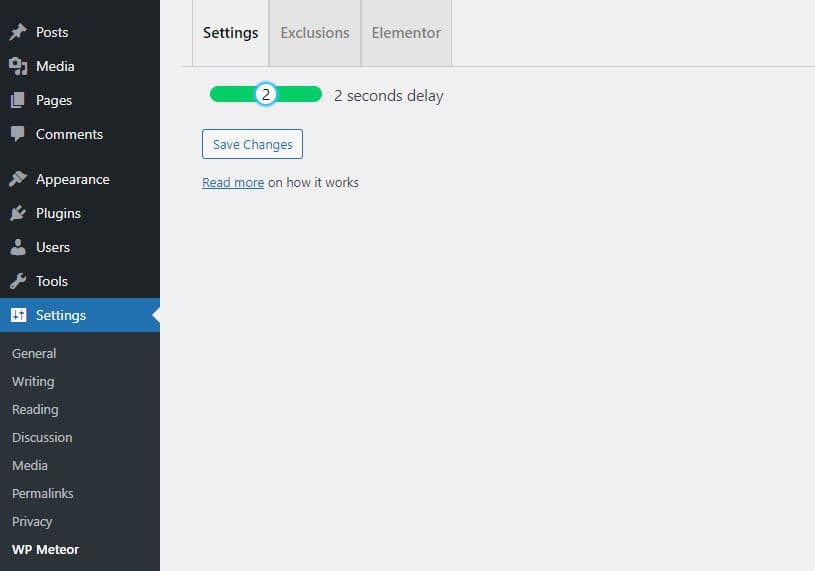
It’s important to note that TBT on GTmetrix will increase further after a setting a delay of 2 seconds. However, TBT on Google Page Speed Insights will reduce and the real user experience will also improve. Performance scores on GTmetrix will become worse because GTmetrix will keep waiting until the scripts load. In simple words, it will add up additional 2 seconds as well in Total Blocking time. If you are more concerned about GTmetrix scores then you can enable delay until user interaction which will give the best results on all tools.
Using WP Rocket
WP Rocket is the premium plugin and most recommended cache plugin. In version 3.9 and above they have improved the “Delay JS” feature to delay the firing of JS until user interaction. It does not only improve TBT but also improves the overall experience and Core Web Vitals.
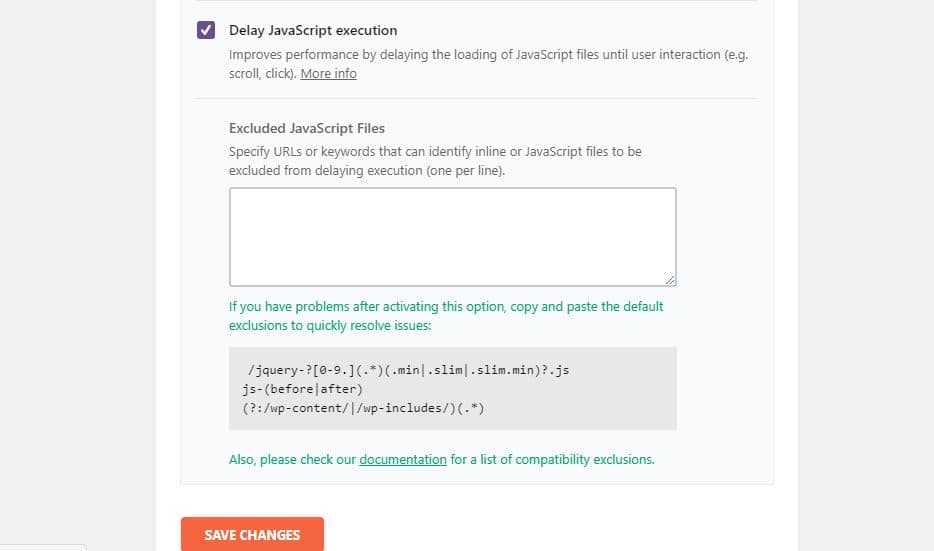
After uploading and activating the plugin you can find the “Delay JS” option in the File Optimization tab of settings. You can enable this option to reduce the Total Blocking Time of your website. WP Rocket already has a detailed list of exclusions mentioned in an official blog. So you can confidently enable “delay JS” while excluding specific scripts which otherwise can break the site if execution is delayed.
Defer JavaScript
Deferring JS can improve Total Blocking time by fixing render-blocking JS. It is helpful because all of the JS which can not be delayed in the previous step will be deferred.
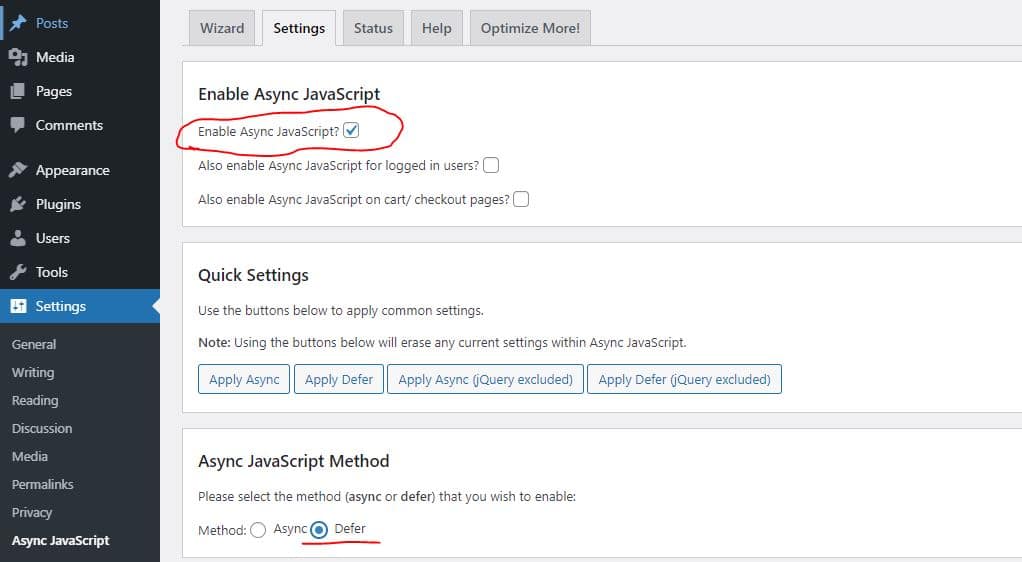
Defer JS is already part of WP Rocket. So if you have WP Rocket then you can enable Defer JS option in the File optimization tab. However, if you want to use a free plugin then I would recommend Async JavaScript. It is a free plugin available in the WordPress repository. After activating the plugin you can access its settings page by going to settings and then “Async JavaScript”.
Enable Async JavaScript and select “Defer” for the Async JavaScript method.
Optimize Images
Large size and unoptimized images can add to Total Blocking time significantly. Image optimization involves the following steps:
Compressing Images
Images should be compressed to reduce their size. Images can be manually compressed one by one using the online tool Shortpixel. However, if there are too many images and you do not want to compress them manually then I would recommend Imagify which is free and also has a premium version with more quota for a number of images. The configuration of Imagify is simple. You will have to create an account to get an API key. After getting the API key and connecting with a plugin, “Bulk Optimizer” can be found in the settings. It’s important to keep the website open until the image optimization process is complete.
Scaling/Resizing Images
Instead of using images with large dimensions and then specifying their width and height, using images after resizing them to the required dimensions can reduce image size greatly and improve its loading time. There are many photo editing tools like Photoshop that can help in resizing images but I would recommend online tool that can save your time.
Preloading Images
Preloading Images that are in the viewport will improve Largest Contentful Paint (LCP) and TBT as well. To preload images, you need to detect images that need preloading first. Using GTmetrix Screenshot and Waterfall can simplify this process.

In the above picture, you can see the Hero image in GTmetrix Screenshot is loading at last. So we should preload this image to save some milliseconds which will result in an improvement of Blocking time and LCP as well.
Similarly, images that need preloading can be detected from GTmetrix waterfall as well by clicking on the “Images” tab and observing the images with long bars or for which bar is starting a late.
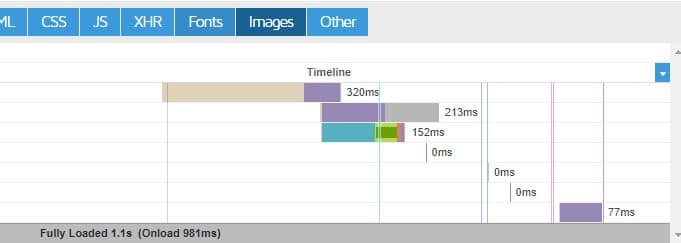
After detecting the images that need preloading, images can be preloaded now. To preload images add the below code before closing the head tag (</head>) of the page either manually or using a plugin.
<link rel="preload" as="image" href="/wp-content/uploads/2016/12/image.png"/>or
<link rel="preload" as="image" href="https://yourdomain.com/wp-content/uploads/2016/12/Banner1.png"/>Don’t forget to replace the image path or URL inside “href” attribute.
Preload Fonts
Just like as we discussed preloading of images, Fonts hosted locally on your server can also be preloaded. Example code for preloading front type woff2 is as under:
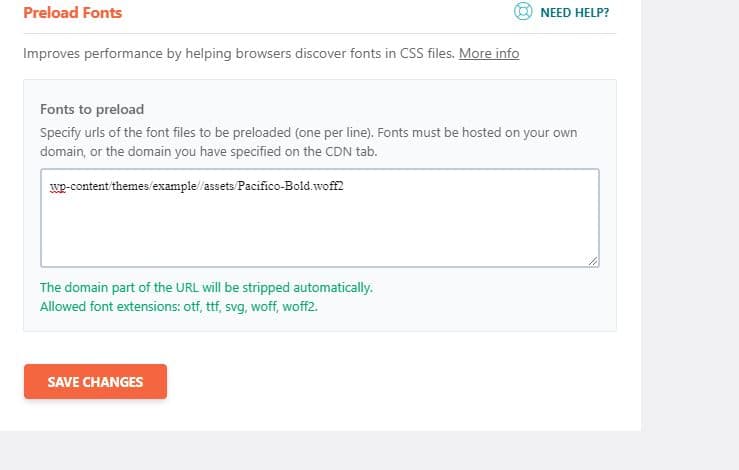
<link rel="preload" href="/assets/Pacifico-Bold.woff2" as="font" type="font/woff2" crossorigin>The above code should be added before closing the head tag (</head>). All the locally hosted fonts can be preloaded.
If you are using WP Rocket then you do not need to add code manually as WP Rocket already has a feature to preload Fonts. Go to WP Rocket Settings>>Preload>>Preload Fonts. Enter the URL of locally hosted fonts to preload them.
Prefetch DNS for External Assets
We discussed above preloading locally hosted Fonts but what if fonts load externally? Many websites rely on Google Fonts loading externally. So, to improve the loading time of external assets like Google Fonts, Google Analytics, etc. we can prefetch DNS requests for these domains.
So, to preload Google Fonts we can add the below code before the closing head tag.
<link rel="dns-prefetch" href="https://fonts.googleapis.com/">Luckily, WP Rocket already has the feature of prefetching DNS as well. You will find the option in the “Preload” Section.
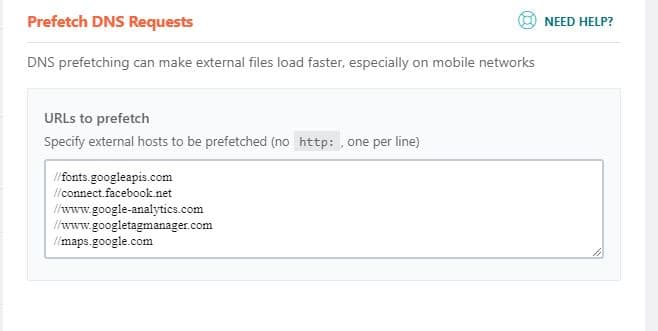
Recommended domains to prefetch for most of the sites are as under:
//fonts.googleapis.com
//connect.facebook.net
//www.google-analytics.com
//www.googletagmanager.com
//maps.google.com
After following all of the above-mentioned steps, retest your site on Google Page Speed Insights. Let me know in the comments if this article has helped you to fix Total Blocking Time?
You can also check my detailed article How to fix CLS caused by WP Rocket.
I hope this article helped you learn how to fix total blocking time (TBT) in WordPress. If you have any questions or need more customization, you can let me know in the comments. You can also Subscribe to my Youtube Channel where I will post some helpful tutorials. If you want me to write about any specific customization in WordPress, you can let me know in the comments.

